
🎯 สิ่งที่คุณจะได้เรียนรู้
- ✅ การออกแบบโครงสร้างหุ่นยนต์
- ✅ การเขียนโปรแกรม Arduino
- ✅ การควบคุม Servo Motors
- ✅ การสร้างระบบเคลื่อนไหว
- ✅ การเชื่อมต่อเซ็นเซอร์
- ✅ การออกแบบ 3D และการพิมพ์
- ✅ การประกอบและทดสอบ
- ✅ การปรับแต่งและพัฒนาต่อ
รู้จักกับ BURN-E
BURN-E (Basic Utility Repair Nano Engineer) เป็นหุ่นยนต์ตัวเล็กจากภาพยนตร์ WALL-E ที่มีหน้าที่เชื่อมโลหะและซ่อมแซมภายนอกยานอวกาศ แม้จะปรากฏในภาพยนตร์เพียงช่วงสั้นๆ แต่ตัวละครตัวนี้ได้รับความนิยมจากแฟนๆ มากมาย
BURN-E จากภาพยนตร์ WALL-E - แรงบันดาลใจสำหรับโปรเจคของเรา
ที่มา: Hackaday.com
วันนี้เราจะมาสร้าง BURN-E เวอร์ชัน Arduino ที่สามารถเคลื่อนไหว ควบคุมแขนกล และจำลองการทำงานเชื่อมโลหะได้จริง!
อุปกรณ์และชิ้นส่วนที่ต้องใช้
Arduino Uno R3
฿890ตัวควบคุมหลักของหุ่นยนต์ รับผิดชอบการประมวลผลและควบคุมการเคลื่อนไหวทั้งหมด
Servo Motors SG90
฿120 x 4สำหรับควบคุมการเคลื่อนไหวของแขน หัว และระบบขับเคลื่อน
Battery Pack 6V
฿180แหล่งจ่ายไฟสำหรับ Servo Motors และระบบทั้งหมด
LED Strip WS2812B
฿150สำหรับจำลองแสงเชื่อมโลหะและไฟสถานะต่างๆ
Ultrasonic Sensor
฿120เซ็นเซอร์วัดระยะทางสำหรับหลีกเลี่ยงสิ่งกีดขวาง
Buzzer Module
฿45สำหรับเสียงเตือนและเสียงประกอบการทำงาน
💰 สรุปค่าใช้จ่าย
อุปกรณ์อิเล็กทรอนิกส์:
- • Arduino Uno: ฿890
- • Servo Motors (4ตัว): ฿480
- • LED Strip: ฿150
- • Sensors: ฿165
วัสดุและอุปกรณ์:
- • Battery Pack: ฿180
- • Jumper Wires: ฿80
- • Breadboard: ฿120
- • Chassis Materials: ฿300
รวมทั้งหมด: ประมาณ ฿2,365
*ไม่รวมค่าจัดส่งและ 3D Printing
การออกแบบโครงสร้าง
BURN-E มีลักษณะเฉพาะที่แตกต่างจาก WALL-E คือมีแขนเชื่อมโลหะและระบบขับเคลื่อนแบบล้อเลื่อน เราจะออกแบบให้มีการเคลื่อนไหวที่สมจริงและน่ารักเหมือนในภาพยนตร์
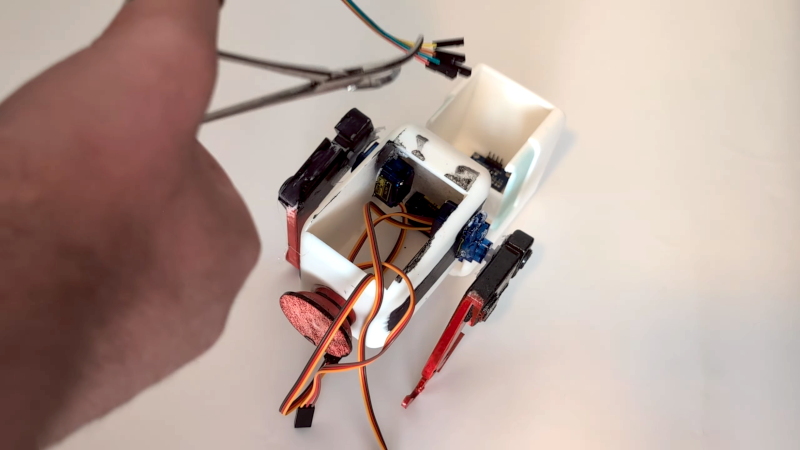
🏗️ โครงสร้าง BURN-E
โครงสร้างและการจัดวาง Servo Motors ของ BURN-E
ส่วนประกอบหลัก
- 🤖 ตัวหุ่นยนต์: ขนาดประมาณ 20x15x25 ซม. ทำจากอะคริลิคหรือ 3D Print
- 🔥 แขนเชื่อมโลหะ: ควบคุมด้วย Servo พร้อม LED จำลองแสงเชื่อม
- 👁️ หัวหุ่นยนต์: มีเซ็นเซอร์ Ultrasonic และ LED ตา
- 🚗 ระบบขับเคลื่อน: ล้อเลื่อนควบคุมด้วย Servo
- 💡 ระบบแสง: LED Strip สำหรับเอฟเฟกต์และสถานะ
การเชื่อมต่อวงจร
🔌 Wiring Diagram
แผนผังการเชื่อมต่อวงจรของ BURN-E
⚠️ ข้อควรระวังในการต่อวงจร
- ตรวจสอบขั้วบวก-ลบของแบตเตอรี่ให้ถูกต้อง
- Servo Motors ใช้ไฟ 6V แยกจาก Arduino (5V)
- ใช้ Capacitor 1000µF ที่แหล่งจ่ายไฟเพื่อลดสัญญาณรบกวน
- เชื่อมต่อ Ground ทุกอุปกรณ์เข้าด้วยกัน
- ทดสอบการเชื่อมต่อทีละชิ้นก่อนเปิดใช้งานทั้งหมด
การเขียนโปรแกรม Arduino
โค้ดสำหรับ BURN-E จะแบ่งเป็นส่วนต่างๆ เพื่อให้ง่ายต่อการเข้าใจและปรับแต่ง เริ่มจากการควบคุมพื้นฐานไปจนถึงการเคลื่อนไหวที่ซับซ้อน
โค้ดหลัก (Main Code)
/*
 * BURN-E Robot - Arduino Control System
 * Basic Utility Repair Nano Engineer
 *
 * Features:
 * - 4 Servo Motors for movement
 * - Ultrasonic sensor for obstacle detection
 * - LED strip for welding effects
 * - Buzzer for sound effects
 * - Autonomous and manual control modes
 */

#include <Servo.h>
#include <Adafruit_NeoPixel.h>

// Pin definitions
#define SERVO_TORCH_PIN 3      // Welding torch arm
#define SERVO_ARM_PIN 5        // Right arm
#define SERVO_HEAD_PIN 6       // Head pan
#define SERVO_DRIVE_PIN 9      // Drive system
#define LED_STRIP_PIN 10       // WS2812B LED strip
#define BUZZER_PIN 11          // Buzzer
#define ULTRASONIC_TRIG 12     // Ultrasonic trigger
#define ULTRASONIC_ECHO 13     // Ultrasonic echo

// Constants
#define LED_COUNT 8            // Number of LEDs in strip
#define OBSTACLE_DISTANCE 20   // Obstacle detection distance (cm)
#define SERVO_DELAY 15         // Delay between servo steps (ms)

// Create servo objects
Servo torchServo;
Servo armServo;
Servo headServo;
Servo driveServo;

// Create LED strip object
Adafruit_NeoPixel strip(LED_COUNT, LED_STRIP_PIN, NEO_GRB + NEO_KHZ800);

// Robot state variables
enum RobotMode {
  IDLE,
  WELDING,
  MOVING,
  SCANNING,
  EMERGENCY_STOP
};

RobotMode currentMode = IDLE;
unsigned long lastModeChange = 0;
unsigned long lastWeldingEffect = 0;
bool isWelding = false;
int headPosition = 90;  // Center position
int torchPosition = 90;
int armPosition = 90;

// Movement patterns
int weldingSequence[] = {70, 110, 90, 120, 80, 100, 90};
int scanningSequence[] = {45, 135, 90, 60, 120, 90};
int currentSequenceStep = 0;

void setup() {
  Serial.begin(9600);
  Serial.println("BURN-E Initializing...");

  // Initialize servos
  torchServo.attach(SERVO_TORCH_PIN);
  armServo.attach(SERVO_ARM_PIN);
  headServo.attach(SERVO_HEAD_PIN);
  driveServo.attach(SERVO_DRIVE_PIN);

  // Initialize LED strip
  strip.begin();
  strip.show(); // Initialize all pixels to 'off'

  // Initialize pins
  pinMode(BUZZER_PIN, OUTPUT);
  pinMode(ULTRASONIC_TRIG, OUTPUT);
  pinMode(ULTRASONIC_ECHO, INPUT);

  // Move to initial positions
  moveToInitialPosition();

  // Startup sequence
  playStartupSequence();

  Serial.println("BURN-E Ready!");
  currentMode = IDLE;
}

void loop() {
  // Check for obstacles
  float distance = getDistance();

  // Handle emergency stop
  if (distance < 10 && currentMode == MOVING) {
    currentMode = EMERGENCY_STOP;
    emergencyStop();
  }

  // Main state machine
  switch (currentMode) {
    case IDLE:
      handleIdleMode();
      break;

    case WELDING:
      handleWeldingMode();
      break;

    case MOVING:
      handleMovingMode();
      break;

    case SCANNING:
      handleScanningMode();
      break;

    case EMERGENCY_STOP:
      handleEmergencyStop();
      break;
  }

  // Update LED effects
  updateLEDEffects();

  // Check for mode changes
  checkModeChange();

  delay(50); // Main loop delay
}

void moveToInitialPosition() {
  Serial.println("Moving to initial position...");

  // Move all servos to center position slowly
  moveServoSmoothly(torchServo, 90);
  delay(500);
  moveServoSmoothly(armServo, 90);
  delay(500);
  moveServoSmoothly(headServo, 90);
  delay(500);
  moveServoSmoothly(driveServo, 90);

  // Update position variables
  torchPosition = 90;
  armPosition = 90;
  headPosition = 90;
}

void playStartupSequence() {
  Serial.println("Playing startup sequence...");

  // LED startup effect
  for (int i = 0; i < LED_COUNT; i++) {
    strip.setPixelColor(i, strip.Color(0, 255, 0)); // Green
    strip.show();
    delay(100);
  }

  // Sound effect
  for (int i = 0; i < 3; i++) {
    tone(BUZZER_PIN, 1000, 200);
    delay(300);
  }

  // Clear LEDs
  strip.clear();
  strip.show();
}

void handleIdleMode() {
  // Subtle breathing LED effect
  static int brightness = 0;
  static int direction = 1;

  brightness += direction * 2;
  if (brightness >= 50) direction = -1;
  if (brightness <= 0) direction = 1;

  for (int i = 0; i < LED_COUNT; i++) {
    strip.setPixelColor(i, strip.Color(0, brightness, brightness/2));
  }
  strip.show();

  // Random head movements
  if (millis() - lastModeChange > 3000) {
    if (random(100) < 10) { // 10% chance
      int newHeadPos = random(60, 120);
      moveServoSmoothly(headServo, newHeadPos);
      headPosition = newHeadPos;
    }
  }
}

void handleWeldingMode() {
  Serial.println("Welding mode active");

  // Execute welding sequence
  if (currentSequenceStep < sizeof(weldingSequence)/sizeof(int)) {
    int targetPos = weldingSequence[currentSequenceStep];
    moveServoSmoothly(torchServo, targetPos);
    torchPosition = targetPos;

    // Welding effect
    createWeldingEffect();

    currentSequenceStep++;
    delay(1000);
  } else {
    // Sequence complete
    currentSequenceStep = 0;
    currentMode = IDLE;
    lastModeChange = millis();
    Serial.println("Welding sequence complete");
  }
}

void handleMovingMode() {
  Serial.println("Moving mode active");

  // Simple forward movement
  driveServo.write(120); // Move forward

  // Scan ahead while moving
  int scanPos = 90 + 30 * sin(millis() / 1000.0);
  moveServoSmoothly(headServo, scanPos);
  headPosition = scanPos;

  // Check if we should stop moving
  if (millis() - lastModeChange > 3000) {
    driveServo.write(90); // Stop
    currentMode = IDLE;
    lastModeChange = millis();
  }
}

void handleScanningMode() {
  Serial.println("Scanning mode active");

  // Execute scanning sequence
  if (currentSequenceStep < sizeof(scanningSequence)/sizeof(int)) {
    int targetPos = scanningSequence[currentSequenceStep];
    moveServoSmoothly(headServo, targetPos);
    headPosition = targetPos;

    // Scanning LED effect
    createScanningEffect();

    currentSequenceStep++;
    delay(800);
  } else {
    // Sequence complete
    currentSequenceStep = 0;
    currentMode = IDLE;
    lastModeChange = millis();
    Serial.println("Scanning complete");
  }
}

void handleEmergencyStop() {
  // Stop all movement
  driveServo.write(90);

  // Flash red LEDs
  for (int i = 0; i < LED_COUNT; i++) {
    strip.setPixelColor(i, strip.Color(255, 0, 0)); // Red
  }
  strip.show();

  // Emergency sound
  tone(BUZZER_PIN, 2000, 100);
  delay(200);

  // Clear LEDs
  strip.clear();
  strip.show();
  delay(200);

  // Check if obstacle is clear
  if (getDistance() > OBSTACLE_DISTANCE) {
    currentMode = IDLE;
    lastModeChange = millis();
    Serial.println("Emergency cleared");
  }
}

void createWeldingEffect() {
  // Bright white/blue welding flash
  for (int i = 0; i < LED_COUNT; i++) {
    int intensity = random(200, 255);
    strip.setPixelColor(i, strip.Color(intensity, intensity, 255));
  }
  strip.show();

  // Welding sound
  tone(BUZZER_PIN, random(800, 1200), 100);

  delay(random(50, 200));

  // Fade effect
  for (int fade = 255; fade >= 0; fade -= 10) {
    for (int i = 0; i < LED_COUNT; i++) {
      strip.setPixelColor(i, strip.Color(fade/3, fade/3, fade));
    }
    strip.show();
    delay(20);
  }
}

void createScanningEffect() {
  // Moving blue light
  static int scanPos = 0;

  strip.clear();
  strip.setPixelColor(scanPos, strip.Color(0, 100, 255));
  strip.setPixelColor((scanPos + 1) % LED_COUNT, strip.Color(0, 50, 128));
  strip.show();

  scanPos = (scanPos + 1) % LED_COUNT;

  // Scanning beep
  tone(BUZZER_PIN, 1500, 50);
}

void updateLEDEffects() {
  // This function is called every loop to update LED effects
  // Current effects are handled in mode-specific functions
}

void moveServoSmoothly(Servo &servo, int targetPosition) {
  int currentPosition = servo.read();
  int step = (targetPosition > currentPosition) ? 1 : -1;

  for (int pos = currentPosition; pos != targetPosition; pos += step) {
    servo.write(pos);
    delay(SERVO_DELAY);
  }
  servo.write(targetPosition); // Ensure exact position
}

float getDistance() {
  // Send ultrasonic pulse
  digitalWrite(ULTRASONIC_TRIG, LOW);
  delayMicroseconds(2);
  digitalWrite(ULTRASONIC_TRIG, HIGH);
  delayMicroseconds(10);
  digitalWrite(ULTRASONIC_TRIG, LOW);

  // Read echo
  long duration = pulseIn(ULTRASONIC_ECHO, HIGH);
  float distance = duration * 0.034 / 2; // Convert to cm

  return distance;
}

void checkModeChange() {
  // Auto mode changes based on time and conditions
  if (millis() - lastModeChange > 5000) { // 5 seconds in current mode

    if (currentMode == IDLE) {
      // Randomly choose next activity
      int choice = random(3);
      switch (choice) {
        case 0:
          currentMode = WELDING;
          Serial.println("Starting welding sequence");
          break;
        case 1:
          currentMode = MOVING;
          Serial.println("Starting movement");
          break;
        case 2:
          currentMode = SCANNING;
          Serial.println("Starting scan sequence");
          break;
      }
      lastModeChange = millis();
      currentSequenceStep = 0;
    }
  }
}

void emergencyStop() {
  Serial.println("EMERGENCY STOP ACTIVATED!");

  // Stop all servos
  driveServo.write(90);

  // Flash warning
  for (int i = 0; i < 5; i++) {
    for (int j = 0; j < LED_COUNT; j++) {
      strip.setPixelColor(j, strip.Color(255, 0, 0));
    }
    strip.show();
    tone(BUZZER_PIN, 2000, 200);
    delay(300);

    strip.clear();
    strip.show();
    delay(200);
  }
}
ไลบรารี่ที่ต้องติดตั้ง
📚 ไลบรารี่ที่จำเป็น
เปิด Arduino IDE แล้วไปที่ Tools → Manage Libraries และค้นหาติดตั้ง:
- ✅ Servo - ควบคุม Servo Motors (Built-in)
- ✅ Adafruit NeoPixel - ควบคุม LED Strip WS2812B
- ✅ NewPing - ปรับปรุงการทำงานของ Ultrasonic Sensor (Optional)
ขั้นตอนการประกอบ
เตรียมโครงสร้างหลัก
สร้างหรือพิมพ์ 3D โครงสร้างตัวหุ่นยนต์ ขนาดประมาณ 20x15x25 ซม.
- • ใช้อะคริลิค 3mm หรือ PLA สำหรับ 3D Print
- • เจาะรูสำหรับ Servo Motors และสายไฟ
- • ทำช่องสำหรับ Arduino และแบตเตอรี่
ติดตั้ง Servo Motors
ติดตั้ง Servo ทั้ง 4 ตัวในตำแหน่งที่กำหนด
- • Servo 1: แขนเชื่อมโลหะ (ซ้าย)
- • Servo 2: แขนธรรมดา (ขวา)
- • Servo 3: การหมุนหัว
- • Servo 4: ระบบขับเคลื่อน
เชื่อมต่อวงจรไฟฟ้า
เชื่อมต่อ Arduino กับ Servo Motors และเซ็นเซอร์ต่างๆ
- • ใช้ Breadboard สำหรับการเชื่อมต่อ
- • ตรวจสอบขั้วบวก-ลบให้ถูกต้อง
- • ทดสอบการเชื่อมต่อทีละชิ้น
อัพโหลดโปรแกรม
อัพโหลดโค้ดลงใน Arduino และทดสอบการทำงาน
- • เชื่อมต่อ Arduino กับคอมพิวเตอร์
- • เลือก Board และ Port ที่ถูกต้อง
- • อัพโหลดโค้ดและตรวจสอบ Serial Monitor
ทดสอบและปรับแต่ง
ทดสอบการทำงานของแต่ละระบบและปรับแต่งให้เหมาะสม
- • ทดสอบการเคลื่อนไหวของ Servo
- • ปรับค่า Delay และ Speed
- • ทดสอบเซ็นเซอร์และ LED Effects
ประกอบและตกแต่ง
ประกอบชิ้นส่วนทั้งหมดและตกแต่งให้เหมือน BURN-E
- • ติดตั้งฝาครอบและชิ้นส่วนตกแต่ง
- • ทาสีหรือติดสติกเกอร์
- • ทดสอบการทำงานครั้งสุดท้าย
การปรับแต่งและพัฒนาต่อ
🎮 เพิ่มการควบคุมด้วยมือถือ
// เพิ่มโมดูล Bluetooth HC-05 สำหรับควบคุมผ่านมือถือ
#include <SoftwareSerial.h>

SoftwareSerial bluetooth(2, 4); // RX, TX

void setup() {
  bluetooth.begin(9600);
  // ... existing setup code
}

void loop() {
  // Check for Bluetooth commands
  if (bluetooth.available()) {
    String command = bluetooth.readString();
    command.trim();

    if (command == "WELD") {
      currentMode = WELDING;
    } else if (command == "MOVE") {
      currentMode = MOVING;
    } else if (command == "SCAN") {
      currentMode = SCANNING;
    } else if (command == "STOP") {
      currentMode = EMERGENCY_STOP;
    }
  }

  // ... existing loop code
}
🤖 เพิ่ม AI และ Computer Vision
- ESP32-CAM: เพิ่มกล้องสำหรับ Object Detection
- Edge AI: ใช้ TensorFlow Lite สำหรับการรู้จำวัตถุ
- Voice Control: เพิ่มไมโครโฟนสำหรับควบคุมด้วยเสียง
- Path Planning: อัลกอริทึมหาเส้นทางอัตโนมัติ
🔧 การปรับปรุงฮาร์ดแวร์
🔋 ระบบพลังงาน
- • Li-ion Battery 7.4V
- • Solar Panel สำหรับชาร์จ
- • Power Management IC
🚗 การเคลื่อนไหว
- • Stepper Motors แทน Servo
- • Encoder สำหรับ Feedback
- • Omni Wheels
📡 เซ็นเซอร์
- • LiDAR Module
- • IMU 9-axis
- • Color Sensor
การแก้ปัญหาที่พบบ่อย
🔧 ปัญหาและวิธีแก้ไข
Servo ไม่เคลื่อนไหว
- • ตรวจสอบการเชื่อมต่อสายไฟ
- • เช็คแรงดันไฟฟ้า (ต้อง 6V)
- • ลองเปลี่ยน PWM Pin
LED Strip ไม่ติด
- • ตรวจสอบ Data Pin (ต้องเป็น Digital Pin)
- • เช็คไลบรารี่ Adafruit NeoPixel
- • ลองลดจำนวน LED ในโค้ด
Ultrasonic Sensor อ่านค่าผิด
- • ตรวจสอบ Trig และ Echo Pin
- • เพิ่ม delay ระหว่างการอ่านค่า
- • ใช้ NewPing Library
สรุป: BURN-E พร้อมทำงาน! 🎉
🏆 ยินดีด้วย! คุณสร้าง BURN-E สำเร็จแล้ว
หุ่นยนต์ที่ทำงานได้จริง
เคลื่อนไหว เชื่อมโลหะ และหลีกเลี่ยงสิ่งกีดขวางได้
เรียนรู้เทคโนโลยีใหม่
Arduino, Servo, Sensor และการเขียนโปรแกรม
ความภาคภูมิใจ
สร้างตัวละครจากภาพยนตร์ที่รักด้วยมือตัวเอง
🚀 ขั้นต่อไป
พัฒนาต่อ:
- • เพิ่มการควบคุมผ่าน WiFi
- • ใส่กล้องสำหรับ FPV
- • สร้าง WALL-E เป็นเพื่อน
- • เพิ่ม AI สำหรับการเรียนรู้
แชร์ผลงาน:
- • ถ่ายวิดีโอการทำงาน
- • โพสต์ใน Social Media
- • เข้าร่วมชุมชน Maker
- • สอนเพื่อนๆ ทำตาม
🛒 สั่งซื้ออุปกรณ์สำหรับสร้าง BURN-E
อุปกรณ์ทั้งหมดในบทความนี้พร้อมคำแนะนำการใช้งานและ Technical Support จาก Global Byte Shop
💡 พิเศษ! รับคูปองส่วนลด 10% สำหรับโปรเจค BURN-E


